Article: Choosing Shower Niche Tiles for a Finished Look
Choosing Shower Niche Tiles for a Finished Look
A recessed shower niche is a small detail with a disproportionately large visual impact. The right shower niche tiles can make it feel deliberately integrated into the shower wall; the wrong choice can leave an otherwise well-specified bathroom looking busy, awkward or unfinished. Getting the format, grout lines and trim right at the planning stage gives both homeowners and installers a cleaner result.
Why shower niche tiles need their own specification
A shower niche has several surfaces - the back, sides, top and sill - all viewed at close range. It is also constantly exposed to water, shampoo bottles and cleaning products. That means the tile choice must work aesthetically, but it also needs to suit a properly waterproofed installation system, be practical to cut and allow neat finishing at exposed edges.
The niche should not be treated as an afterthought once the main wall tiling is under way. Its finished dimensions need to relate to the selected tile size, especially where full tiles or centred grout joints are part of the intended look. A 600 x 300mm wall tile, for example, offers a very different set of layout options from a 50 x 50mm mosaic.
For larger residential bathrooms and commercial schemes alike, early coordination also helps avoid unnecessary cuts, narrow tile strips and poorly positioned shelves. This is particularly valuable where a shower wall has feature tiles, book-matched porcelain slabs or a strong linear pattern.
Choosing the right shower niche tiles
There is no single correct approach. The best option depends on whether the niche should disappear into the wall finish, act as a decorative focal point, or provide a subtle material contrast.
Continue the main wall tile
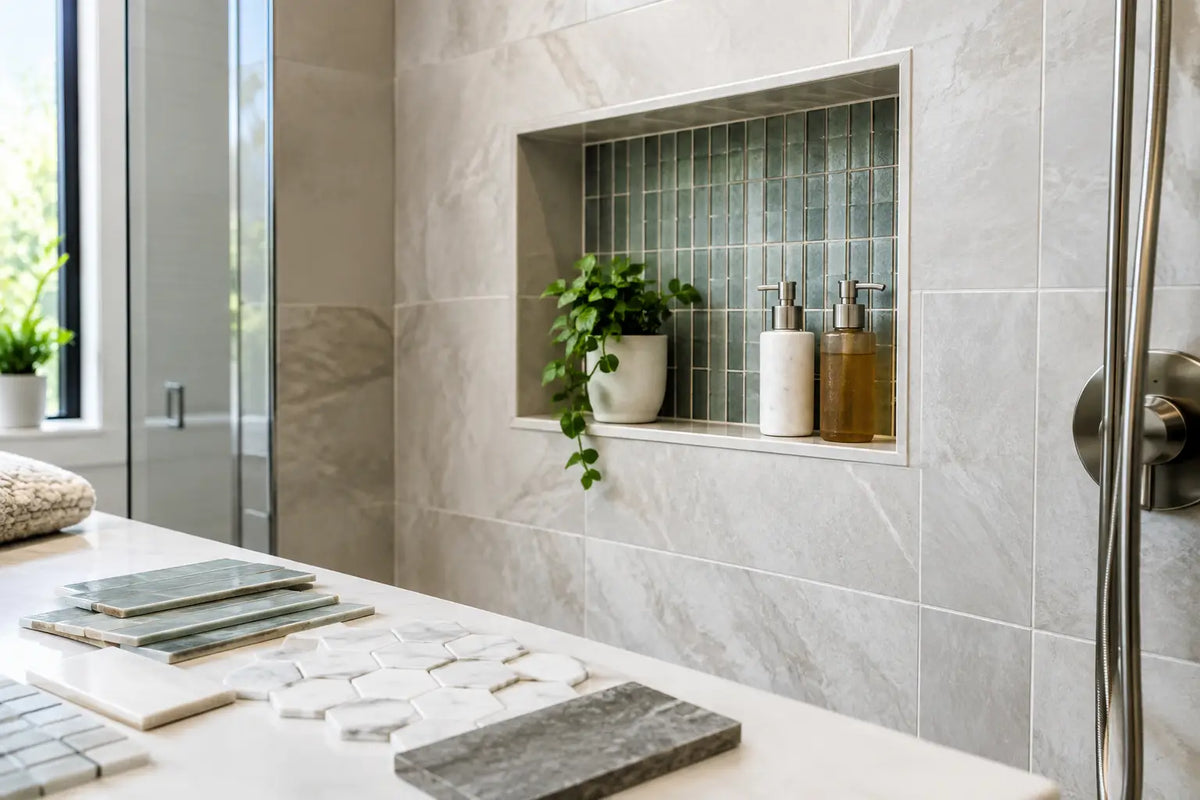
Using the same tile inside and outside the niche is the most cohesive option. It suits calm, contemporary bathrooms where the aim is to create a continuous surface rather than introduce another colour or pattern. Large-format porcelain is especially effective when the niche can be planned around the tile module and the number of cuts kept low.
The trade-off is installation precision. A veined marble-effect porcelain, for instance, needs careful tile selection so that the pattern flows convincingly across the niche. It may require additional material to allow the installer to choose the best cuts. When ordering, account for this alongside normal wastage rather than relying solely on the net wall area.
A matching tile is also a sensible choice for smaller shower areas. It keeps the wall visually open and avoids turning useful storage into an overly prominent design feature.
Use a mosaic or smaller format
Mosaic tiles are a reliable choice for the back of a niche. They are available in glass, porcelain, stone-effect and decorative finishes, and their smaller pieces make it easier to accommodate the internal dimensions without difficult cuts. A mosaic panel can add texture and colour while retaining a controlled, premium appearance.
This approach works well when the main shower walls use large, plain porcelain. A soft-toned kit kat, a matt herringbone mosaic or a small-format glazed ceramic can bring depth to the recess without competing with the wider scheme.
More grout joints do mean more maintenance, particularly in a hard-water area. Choose a quality grout suitable for wet rooms and consider a mid-tone shade rather than brilliant white if easy day-to-day upkeep is a priority. Natural stone mosaics may also require sealing and more specific care, so porcelain is often the lower-maintenance alternative for a working family bathroom or hotel ensuite.
Introduce a contrasting feature tile
A contrasting niche can be used to link the shower to a vanity splashback, floor detail or accent wall. Deep green, cobalt, terracotta and metallic-effect finishes can be highly effective, while a patterned encaustic-look porcelain adds character to otherwise pared-back walls.
The contrast needs to be intentional. Keep the palette connected through one shared element, such as a warm undertone, matching grout colour or complementary brassware. If the bathroom already contains strongly veined wall tiles, patterned flooring and a statement basin, a quieter niche will usually provide better balance.
Tile size, layout and proportions
A niche looks considered when its dimensions respond to the tile layout. Before the wall is boarded and tanked, agree the niche position, height and width with the installer. This makes it possible to centre the recess on a grout joint, align it with the shower valve or use full tiles around its perimeter.
For a single shelf niche, a wide horizontal format is often practical for bottles. A taller recess may suit a more compact shower or provide two levels of storage. The exact depth should be enough for toiletries without making the niche difficult to reach or creating an unnecessarily heavy-looking reveal.
The internal base must fall slightly towards the shower area so water can drain rather than sit on the sill. This is a functional requirement, not a cosmetic preference. It should be formed within the waterproofed construction, then maintained through tiling.
With large-format tiles, it is worth deciding whether the niche back should have a central grout joint, a full tile, or a book-matched arrangement. The latter can look exceptional with marble-effect porcelain, but it demands accurate setting out and sufficient tiles from the same batch. Samples help assess the vein scale, surface sheen and how the colour reads in the bathroom lighting before final quantities are ordered.
Finishes, grout and edge details
Matt porcelain is a popular all-round choice for shower walls and niches because it gives a contemporary surface with understated slip resistance and fewer visible water marks than a high-gloss finish. Gloss ceramic can bring valuable light reflection to a compact bathroom, particularly in pale colours, though it will show water spotting more readily.
The niche edges require a clear finishing decision. Mitred tile edges can create a minimal, almost monolithic look, particularly with rectified porcelain. They require skilled cutting and suitable tile thickness, however, and the exposed edge can be more vulnerable if not handled carefully during installation.
Tile trims offer a crisp and durable alternative. Brushed brass, chrome, black and stainless steel trims can coordinate with brassware and shower screens, while colour-matched ceramic or porcelain trims provide a softer, more traditional finish where available. A trim should be selected with the tile depth and adhesive bed in mind so it sits cleanly with the finished surface.
Grout can either soften the niche or define it. Matching grout keeps the detail quiet, while a contrasting shade highlights geometry and pattern. For larger wall tiles, a narrow grout joint usually supports a refined appearance, subject to the tile manufacturer's requirements and the substrate. Avoid choosing grout only from a paper swatch - compare it against the actual tile sample in the intended lighting.
Installation points that should not be compromised
A visually impressive niche will not compensate for poor waterproofing. The surrounding shower area should be prepared with a compatible tanking system, including corners, board joints and the niche itself. Adhesive, grout, sealant, trims and backer boards should be selected as a coordinated system suitable for wet areas.
The niche is not a substitute for structural support. It must be formed within a suitable wall construction without weakening studwork or interfering with plumbing. On an external wall, insulation and condensation risk also need consideration. These details are best resolved before tiling begins, particularly on renovation projects where pipe runs and existing construction can limit the available depth.
Check tile batch numbers before installation and inspect tiles in good light. Directional products, including wood-effect planks, veined porcelain and some handmade-look ceramics, should be dry laid or reviewed before fixing to achieve a balanced blend. Allow for cuts, pattern matching and spares when calculating quantities, not simply the visible internal area of the niche.
A detail worth planning early
The most successful shower niches look simple because the planning is thorough. Select the wall tile first, decide whether the recess should blend in or contrast, then establish its size around the tile layout and the products it needs to hold. With samples, accurate coverage calculations and compatible installation materials considered together, the finished niche becomes a practical feature that feels fully part of the bathroom rather than added to it later.