

Article: Luxury Bathroom Wall Finishes That Perform
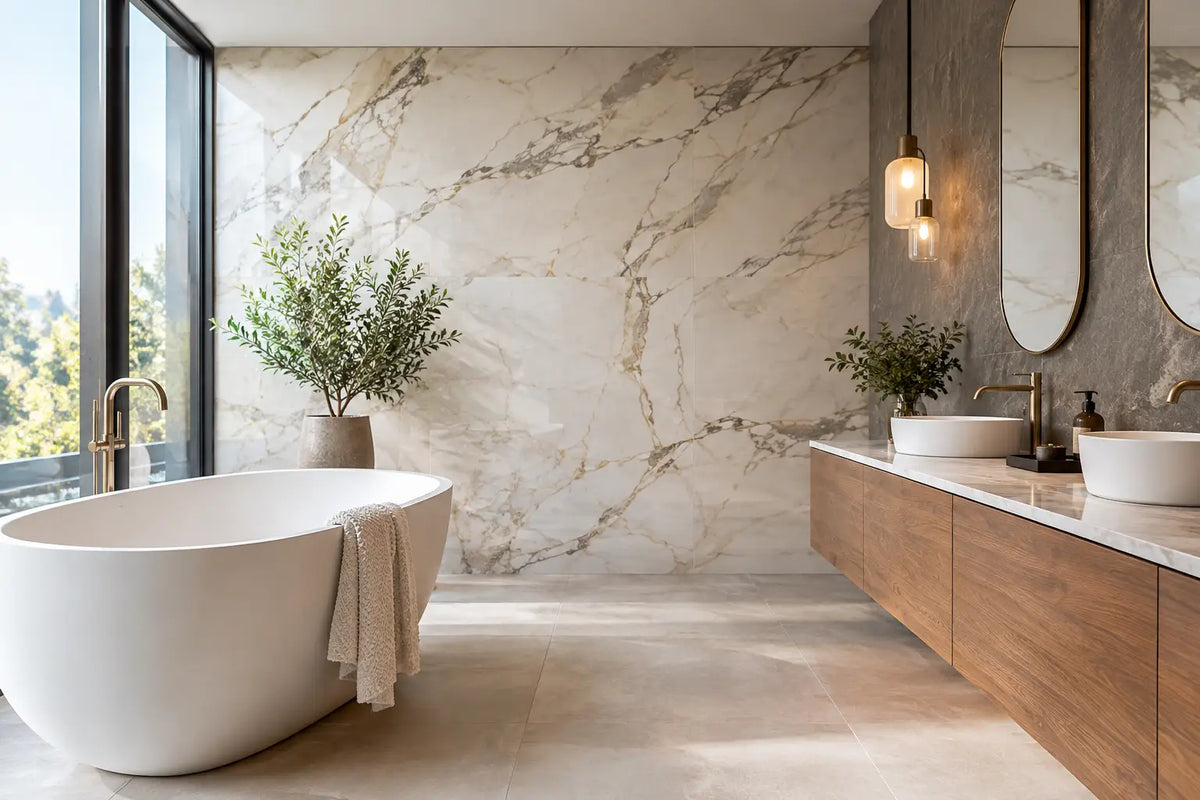
Luxury Bathroom Wall Finishes That Perform
A high-specification bathroom can be undermined by the wrong wall surface long before the brassware or lighting is fitted. Luxury bathroom wall finishes need to do more than look impressive under showroom lighting: they must handle steam, splashes, cleaning routines and the visual demands of a carefully considered interior.
For homeowners, designers and contractors, the best choice is rarely simply the most expensive material. Scale, surface texture, grout detail, substrate preparation and the location of each finish all affect the final result. The aim is a bathroom that feels composed and premium while remaining practical to install and maintain.
What Makes a Bathroom Wall Finish Feel Luxurious?
Luxury is often created through restraint. Large-format porcelain with fine joints can make a compact en suite feel calmer and more expansive. A richly veined stone-effect tile can bring depth without introducing the porosity and maintenance requirements of natural stone. A decorative tile may become the focal point behind a basin, provided it is balanced by quieter finishes elsewhere.
The quality of the finish also matters at close range. Consider the clarity of a printed stone design, the depth of a glaze, the consistency of tile calibres and the way a surface responds to light. Matt finishes tend to give a soft, architectural appearance, while polished tiles offer reflection and formality. Neither is automatically better. A polished marble-effect wall may suit a refined principal bathroom, whereas a velvety matt porcelain can be more appropriate for a contemporary spa-style scheme.
Proportion is equally important. Small tiles are not less luxurious, but they create more joint lines and a more detailed character. Large tiles reduce visual interruption, although they demand accurate setting out, a suitably flat wall and experienced installation. The right format should support the room, rather than follow a trend without consideration.
Luxury Bathroom Wall Finishes to Specify
Large-format porcelain
Porcelain is one of the strongest all-round options for bathroom walls. It is low-absorption, durable and available in convincing marble, limestone, concrete, metal and onyx effects. This makes it particularly useful where a design calls for a natural-material look with more predictable upkeep.
Large formats, including 600 x 1200mm and larger slab-style designs, create a continuous surface with fewer grout lines. They work especially well in walk-in showers, behind freestanding baths and across full-height feature walls. However, larger tiles are heavier and less forgiving of uneven backgrounds. Check that the wall construction, tile backing board and adhesive system are suitable before ordering.
For many projects, a rectified porcelain tile with a narrow, carefully colour-matched grout joint offers the most polished result. A narrow joint should never be forced at the expense of tile alignment or movement allowance, but it can significantly elevate the appearance of a stone-effect design.
Ceramic wall tiles
Ceramic tiles remain an excellent choice for dry bathroom walls and areas away from constant water exposure. They offer exceptional variety in colour, shape and decorative glazing, often at a more accessible price point than porcelain. This allows the budget to be directed towards statement fittings, custom joinery or a higher-value shower enclosure.
Gloss metro tiles, handmade-effect squares and fluted ceramics can all feel considered when specified with the right grout and layout. A glossy tile can brighten a bathroom with limited natural light; a crackle-glaze or handmade-look tile brings variation and character. Where a decorative ceramic has a crackle or more absorbent surface, always confirm whether sealing is required and whether it is suitable for the intended wet area.
Natural stone
Natural marble, travertine, limestone and slate bring genuine variation that manufactured surfaces cannot fully replicate. Every piece has its own movement, mineral detail and tonal shift, producing a finish with real presence in a high-end residential bathroom or boutique hospitality setting.
That individuality comes with responsibility. Most natural stone requires sealing, and some stones are more sensitive to acids, staining and incorrect cleaning products. Honed marble can show water marks and etching more readily than porcelain, while softer limestones need careful selection for showers and heavily used family bathrooms. Stone should be chosen because its natural patina is welcome, not because an entirely uniform surface is expected.
It also needs a suitable installation system. Substrate preparation, adhesive colour, sealing sequence and grout selection should be planned before work begins. Pale translucent stones may require a white adhesive to avoid shadowing, while mesh-backed mosaics need particular product compatibility checks.
Decorative, textured and feature tiles
A feature wall is often the most efficient way to introduce colour or personality without overwhelming the room. Deep green kit-kat tiles behind a vanity, blue glazed tiles within a shower recess or a patterned porcelain panel behind a bath can create a clear focal point.
Textured tiles deserve careful lighting consideration. Fluting, ripples and relief patterns look their best when side lighting picks up their shadow and depth. In a poorly lit room, the same surface can appear flatter than expected. Ordering a sample and viewing it against the proposed lighting, paintwork and brassware is a practical step that avoids expensive changes later.
For shower walls, check that the tile profile can be grouted and cleaned comfortably. Very deep textures and highly irregular handmade finishes can collect residue in a hard-water area. They may be better reserved for a basin wall or a less exposed section of the bathroom.
Select the Finish for Each Zone
A bathroom does not need one material used everywhere. In fact, a layered approach often looks more expensive and performs better. Use a highly water-resistant porcelain in the shower, then introduce ceramic or decorative tiles on the vanity wall. Continue the shower tile onto the floor or into a recessed niche to connect the space without making every surface identical.
Wet zones need the closest scrutiny. Shower enclosures, wet rooms and walls around baths should be installed over an appropriate waterproofed background, rather than relying on tiles and grout alone to resist moisture. Tile backer boards, tanking systems, compatible adhesives and quality silicone at movement joints are part of the finish, even though they are not visible once the room is complete.
A bathroom with adequate ventilation is also easier to keep looking new. Extractor performance, window ventilation and sensible heating all reduce lingering condensation. No premium wall material is a substitute for managing moisture within the room.
Grout, Trims and Layout Are Part of the Design
The details around a tile frequently separate an adequate installation from a luxury one. Grout can be matched closely to create a quieter field of colour, or contrasted to emphasise a geometric layout. A warm grey grout may complement stone-effect porcelain better than a stark white, while a tonal shade can soften the grid of smaller-format tiles.
Choose grout with the room's cleaning requirements in mind. Very pale grout in a busy family shower may need more regular care, and very dark grout can show limescale in hard-water locations. Premium grout options with improved stain resistance can be worthwhile where long-term appearance is a priority.
External corners, niches and transitions deserve the same attention. Mitred tile edges can look crisp on suitable porcelain, but require skilful cutting and may be more vulnerable to impact. Metal tile trims in brushed brass, bronze, black or stainless steel provide a defined, durable edge that can coordinate with fittings. The choice should be agreed early, as trim depth must match the selected tile thickness.
Before fixing begins, establish the tile layout. Centre lines, cuts around a basin or window, niche dimensions and the height of full tiles all influence the finished composition. A narrow sliver of tile at an obvious edge can make an otherwise excellent material look poorly planned. For larger bathrooms and commercial schemes, a setting-out drawing is often time well spent.
Plan Quantities and Installation Before Ordering
Measure each wall accurately, allowing separately for windows, doors and built-in furniture. Then add a sensible wastage allowance for cuts, breakages, pattern matching and future repairs. A simple straight layout may need around 10 per cent extra, while diagonal layouts, large-format tiles, patterned designs and rooms with many corners can require more.
Order samples before committing to a full scheme, particularly for marble-effect, textured and coloured tiles. Images are useful, but the scale of veining, undertone of white and level of surface sheen need to be seen in the intended room. For natural stone, ask to view the current batch where possible, as variation is intrinsic to the product.
It is sensible to order the required adhesive, grout, trims, sealers and waterproofing products alongside the tiles. This reduces the risk of delays or incompatible materials once the installer is on site. Smart Tiles can support this process with samples, coverage calculations and a coordinated selection of surface and installation products.
The most successful bathroom walls are not chosen in isolation. Take a sample home, place it beside the vanity finish and brassware, and view it in morning and evening light. That small decision-making step is often where a good bathroom scheme becomes one that feels genuinely complete.

